Joy-Con Droid APK v1.0.91.2
AmbuSoft
Joy-Con Droid is a JoyCon emulator that turns your Android device to a Nintendo Switch Joycon.
Nintendo Switch is one of the most popular and best-selling video game consoles. It requires a pair of Joy-Cons to work. Without them, a Nintendo Switch is of no use. If you own a Nintendo Switch without JoyCons Controller or only one controller, Joy-Con Droid App is for you. It is an advanced technology that can convert your Android phone into a controller. With this App, you can use your mobile phone as a Nintendo Switch JoyCon. However, you must know that this App requires root and Magisk Module.
Contents
About Joy-Con Droid
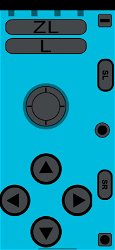
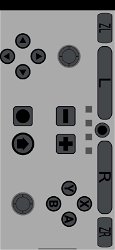
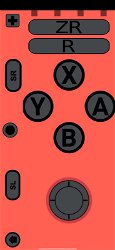
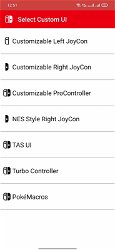
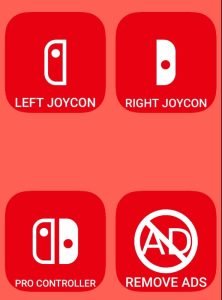
Joy-Con Droid is a free Nintendo Switch Joycon emulator that turns your Android device into a Left Joycon, Right Joycon, or Pro Controller. The App lets you choose a custom UI from Customizable Left JoyCon, Right JoyCon, and ProController, NES Style Right JoyCon, TAS UI, Turbo Controller, and PokéMacros.
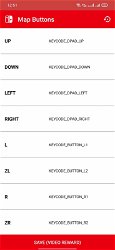
Besides, you can remap the buttons in your controller and take advantage of features like Gyroscope and Accelerometer. Also, you can change the color settings of your controller. Plus, the App has a guide to help you go through and use it.
Before moving any further, you must know that the App works only on Android 9.0 or later OS. The latest Switch Firmware has Bluetooth Device Class check to check your device is a gamepad. Therefore, your device must be rooted with Magisk, so you can use the Bluetooth++ Module and change your device class to 002508.
Alternatively, you can change your Bluetooth MAC Address to an actual controller that has already been paired. For that, too, you will require to root access. We recommend Magisk to root your device as it is easier and installs the required file automatically after you install a module.
Features
Pairing With Switch
The App lets you pair your Android device to Switch as a controller. So, you can use it as a Joy-Con controller for your Nintendo Switch. However, you must fulfill some requirements for it.
Accelerometer
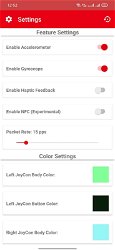
The Accelerometer helps you with motion controls by detecting the approximate orientation and acceleration and offering an image sensor. You can enable it from the Settings of the App.
Gyroscope
This feature gives you freedom of movement. It is responsible for aiming in the direction where your camera moves through the controller movement. You can enable it from the App Settings.
Custom Gamepad Interfaces
Moreover, the App allows users to use Custom UIs. You can select from Customizable Left JoyCon, Right JoyCon, and ProController, NES Style Right JoyCon, TAS UI, Turbo Controller, and PokéMacros.
Remap Buttons
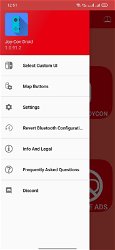
You can also remap the controller buttons according to your preferences. Go to More Menu from the left side of your screen and go to Map Buttons to remap buttons for your controller.
Customizations
The App allows users to customize the controller settings. You can adjust the Packet Rate, Controllers’ Body and Button colors, and device settings.
You may also like 72 in 1 Apk, Dolphin Emulator, and Cool Rom Apk.
How to Install Joy-Con Droid APK
Before moving to the installation procedure, look at the requirement list below.
Requirements:
- A device with Android 9.0 or up
- Support for Bluetooth HID Profiles. You can check it with a tester App. If not default-supported, install Bluetooth HID Enaber – Magisk Module.
- Root with Magisk.
Installation Guide:
To install the Joy-Con Droid App on your device, you must first set up your Android device. Enable the Unknown Sources Installations from Security Settings. And then proceed to the downloading and installing process.
- Download the Joy-Con Droid APK on your Android device.
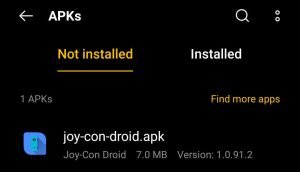
- After downloading it, find the downloaded APK file in your Downloads and tap on it.
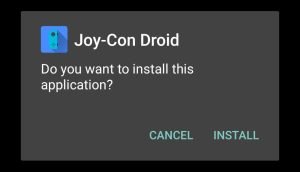
- Now, it will ask you if you want to install the App. Tap on Install and start the App installation.
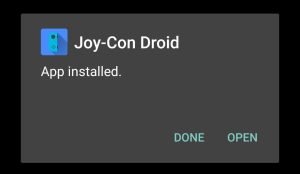
- The installation will take a while. Once done, you can Open the App and use it.
How to Connect Joy-Con Droid to Switch
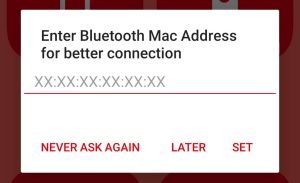
- Turn on your Bluetooth first. And then, enter and save your Bluetooth MAC Address in the App. You do it from Joy-Con Droid Settings.
- Now, choose a controller from the App.
- Then on your Switch, go to Controllers and Sensors. First, Disconnect Controllers and then go to Change Grip/Order.
- Tap Pair when the pairing message appears.
- Afterward, your controller will now appear in Switch. Press SL and SR together (if using a single JoyCon.)
- And then continue with the right action button.
Points to Remember
#1- Joy-Con Droid itself does not need root access. But the procedure to pair your device to Switch requires.
#2- This process requires a device that supports Bluetooth HID Profiles. You can check it with a tester App. And if your device doesn’t have one, you can install the Bluetooth HOD Enabler – Magisk Module.
#3- You must root your device with Magisk so you can use Bluetooth++ to change your Bluetooth Device Class. Or you can also change your Bluetooth MAC Address to a real controller that has been paired to your Switch before.
#4- If you are using a Samsung device or custom ROM with Bluetooth HID_DEV_MTU_SIZE 512, you can use Amiibo.
FAQs
Is JoyCon Droid on Android?
Yes, the App is available for Android. You can use it on all Android with 9.0 or later OS.
How can I use my Android phone as JoyCon?
You can use Joy-Con Droid App to convert your Android into a JoyCon. You must have Android 9.0 or up and Root with Magisk.
Was JoyCon Droid removed?
No, the App is still available on PlayStore, which means it is safe to use.
Conclusion
So, that was all about the Joy-Con Droid App. If you have Nintendo Switch but do not have JoyCons, this App is helpful for you. It will turn your Android device into a JoyCon Controller. However, you must fulfill some requirements first. Your device must be running on a 9.0 or later Android OS. Also, you must have your device rooted with Magisk. Other rooting methods also work, but Magisk is recommended as it makes the process easier. So, download the App and enjoy!
Reviewed by: Melanie Garcia





Ratings and reviews
There are no reviews yet. Be the first one to write one.